On Tuesday night, at around 10 at night, the generator, which had been running happily for three hours or so, suddenly stopped dead. I went out to investigate, and found that it still had fuel in the tank and wouldn’t restart. I cursed it mildly and packed it away for the night. It was dripping wet from the thick fog we were having, and it occurred to me that the last time it had died it had done so after Cambridge had experienced torrential rain.
Some preliminary investigations revealed that the oil warning light came on as you pulled the starter, which had also happened the first time. As the guys at Elliotts (who’d repaired it last time) had said there was water in the fuel that time, I thought I’d investigate this first. In the back of the owners’ manual it explains how to drain the carburettor, which seemed like a good thing to try. Water is heavier than petrol, so it sinks to the bottom of the tank, where it goes down the fuel line and into the carburettor. To drain the carb, open the side maintenance panel (the one surrounding choke lever) and pull out the three lengths of clear plastic tubing that are tucked into the casing – they’re not attached to anything at the bottom. Put them into a container of some sort (I used a large jam jar) that you can use to catch the water/petrol when it drains. Make sure that the engine switch (which is also a fuel valve) is turned ON and then undo the screw on the bottom of the carburettor by a few turns, and the fuel should start to flow. About 200ml of fuel should drain out, and you should be able to tell if what you have is water or petrol.
Mine was definitely petrol and not water!
If you disconnect the HT lead from the spark plug and pull the starting handle, you will pump fresh fuel from the tank through into the carb – you can empty the whole tank this way if you have enough patience.

Position of the carburettor drain screw
Of course, this didn’t solve my problem, which left me thinking that the problem was electrical – some damp mucking with the electrics and preventing the engine from firing. So, last night, seeing as it was clear and breezy, I left the cover off the genny to help it dry out.
This morning, when pulled over, it spluttered briefly into life and then died. Further fiddling made it start about one time in twenty. At this point, encouraged that the thing wasn’t entirely dead, and with assistance from my landlord Martin and his daughter Sabrina, I took the whole thing apart for further investigation.
This is slightly fiddly, but easy when you know how. Now that I do know how, I’m sharing that knowledge, as there seems virtually nothing on the internet about how to fix these generators, which gives an idea as to how reliable they are!
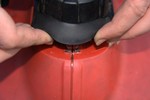
Anyway, first drain the fuel tank – this isn’t totally essential but is recommended on safety grounds. Next, remove the side maintenance cover and unscrew the grey plastic end covers (one around the sockets, one around the exhaust) – they both undo with four screws each and then pull off. To take the rest of the casing off, first peel back the rubber surround around the fuel cap on the side nearest the sockets – you’ll find a small brass circlip which you need to prize off. This is a bit of a fiddle, and even more so to get back on again unless you have circlip pliers.

The circlip under the fuel filler surround
Now undo the screws on either side of the socket panel – there’s one on each side. They’re not captive, so remove them completely from the cover rather than dropping them on the ground when you tip the unit on its side! Roll the unit onto its side, with the starting handle downwards, and undo the screws in the handle and the base. You’ll need a Philips No 3 screwdriver (PH3) and if your unit is like mine, the screws will be very tight indeed. You should now be able to lift off the plastic cover and get at the insides in an ordered fashion. Alternatively (as I did), split the cover in half whilst the machine is upright, and watch everything spill all over the floor!

Anatomy of an EU10i – from back: engine/alternator block, fuel tank, inverter, socket panel
I was looking for the ignition system wiring, which is buried at the bottom of the casing underneath the engine and the inverter unit. This turns out to be a bit below Honda’s usual high standards – the ignition wiring has lots of connectors (some multipole and some bullet crimps) and none of them are very well waterproofed. What eventually solved my problem was getting at the engine switch, which is actually a small black microswitch just below the edge of the maintenance panel. It’s pressed in by the white plastic rod that’s turned by the engine switch knob itself. It’s a proper pain to get at, as you have to unscrew it from the cover from the inside, which involves moving everything else out of the way. Anyway, having unscrewed it, I was able to trace its cable back to a two-pole connector covered in muck and sludge, which I disconnected. Having done this and cleaned the connector, I pulled the starter carefully, and the engine sprang into life. Of course, it wouldn’t stop, as I’d disconnected the ignition switch (oddly, the switch closes to stop the engine) and so we had to stop it by pulling the HT lead off the spark plug.
I decided at this point to clean the water/oil/petrol/WD40/grime out of the casing and electrics, and to waterproof the ignition system connectors with self-amalgamating tape. Thanks to Helen for buying me some whilst she was in Cambridge!

The engine microswitch
Reassembling the generator was a bit fiddly, too. Firstly, reassemble the engine mountings – the rubber disks and metal shafts – there are two in the bottom and one in the handle.

The generator with one side removed. Note the three round engine mountings
The inverter unit (the slim aluminium unit) and the fuel tank have to fit together quite tightly, and there’s a rubber spacer that holds them in the right position:

The inverter (top) and fuel tank (bottom) with the rubber spacer between them
Reassembling the case is fairly easy as long as you have the inverter and fuel tank located correctly in their mountings. You may need a second pair of hands (thanks Sabrina!) to hold the casing together whilst you get the circlip back on.
Anyway, I now have a working generator, and am going to take more detailed steps to stop it getting wet in future – but I hope my experience will help anyone else who suffers similar problems.


